Understanding Oscilloscope Basics
In the world of electronics, oscilloscopes are indispensable tools used for testing, troubleshooting, and analyzing signals. Whether you are an aspiring engineer, a hobbyist, or a seasoned professional, mastering the use of an oscilloscope can enhance your understanding of electronic circuits and systems. Among the various types of oscilloscopes available, handheld oscilloscopes stand out for their portability and ease of use. The oscilloscope for beginners can be particularly advantageous, offering a practical solution for those new to electronics. In this guide, we will explore the fundamentals of oscilloscopes, key features of handheld models, and their significance for novices.
What is an Oscilloscope?
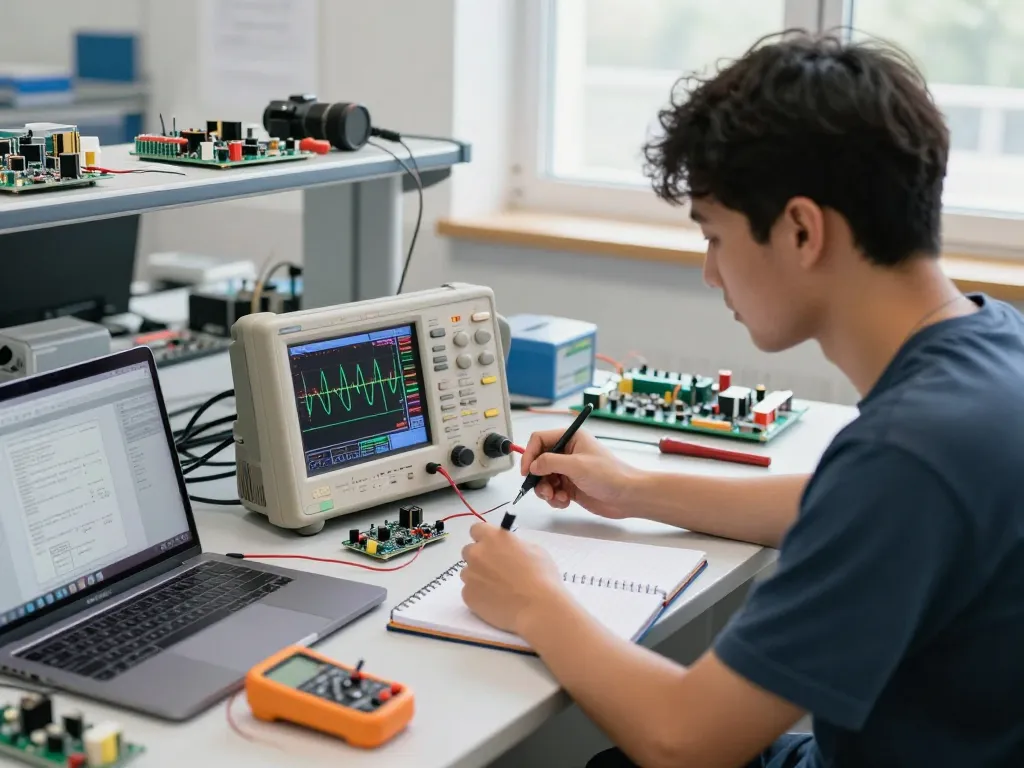
An oscilloscope is a versatile electronic instrument that allows users to visualize electrical signals in the form of waveforms. By graphically displaying voltage against time, oscilloscopes enable users to observe signal characteristics such as amplitude, frequency, and distortion. The waveforms displayed can vary from simple sine waves to complex digital signals, providing vital insights during circuit development and testing.
Key Functions and Features of Handheld Oscilloscopes
Handheld oscilloscopes offer several essential functions and features, making them ideal for both beginners and experts in the field. Some of the key functionalities include:
- Waveform Display: The primary function of any oscilloscope is to display waveforms. Handheld models often feature bright, high-resolution screens, making it easy to analyze signals in various lighting conditions.
- Multi-channel Inputs: Many handheld oscilloscopes come with multiple channels, allowing users to compare different signals in real time. This is particularly useful for diagnosing issues in complex circuits.
- Built-in Measurement Tools: Features such as automatic measurements for frequency, period, and amplitude help streamline the testing process.
- Portability: Designed for convenience, handheld oscilloscopes are lightweight and battery-operated, facilitating on-the-go measurements.
- Advanced Triggering Options: For accurate and stable waveform display, quality oscilloscopes offer various triggering modes that help isolate specific events within a signal.
Why Oscilloscopes are Important for Beginners
For beginners, gaining proficiency with an oscilloscope is crucial to understanding the underlying principles of electronics. Oscilloscopes allow new users to:
- Visualize Signals: Seeing signals in real-time helps beginners grasp how circuits operate, thus deepening their comprehension of electronic concepts.
- Diagnose Problems: The ability to analyze waveforms enables users to identify issues such as noise, distortion, and incorrect signal levels, which are vital for troubleshooting.
- Apply Theory to Practice: Using an oscilloscope allows beginners to transition from theoretical learning to practical application, fostering confidence and skill development.
Choosing the Right Oscilloscope for Beginners
When selecting an oscilloscope, beginners should consider several factors to ensure they choose a model that meets their needs. The right choice will not only facilitate learning but also enhance their ability to perform accurate measurements.
Factors to Consider When Selecting an Oscilloscope
- Bandwidth: A key specification, bandwidth determines the range of frequencies the oscilloscope can accurately capture. Beginners may require less bandwidth, but it’s essential to select an oscilloscope with adequate bandwidth for their intended applications.
- Sample Rate: The sample rate indicates how often the oscilloscope captures data points of a signal. A higher sample rate leads to more accurate waveform representation, especially for fast signals.
- Channel Count: For basic needs, a two-channel oscilloscope may suffice. However, more channels provide flexibility to compare multiple signals simultaneously.
- Portability: Handheld options provide convenience for fieldwork and experiments outside the lab. Look for models with good battery life and lightweight construction.
Recommended Models for Beginners in 2026
As we look forward to 2026, several handheld oscilloscopes stand out for beginners:
- HANMATEK® HO102S: This 3-in-1 model incorporates a 100 MHz bandwidth and 250 MSa/s sample rate, making it ideal for a variety of applications.
- HANMATEK® HO11: Designed for precision testing, this model offers a bandwidth of 40 MHz, suitable for basic electronic troubleshooting.
- HANMATEK® HO52: A 2-in-1 device featuring both oscilloscope and multimeter functions, perfect for those transitioning between measuring techniques.
Understanding Specifications: Bandwidth, Sample Rate, and Channels
To make an informed decision, beginners must understand key specifications:
- Bandwidth: Measured in megahertz (MHz), this indicates the maximum frequency the oscilloscope can measure accurately. A general recommendation for beginners is to look for a model with at least 20 MHz.
- Sample Rate: Expressed in samples per second (Sa/s), this defines how frequently the oscilloscope retrieves data points. Ensure the sample rate is sufficient to capture the highest frequency signals you plan to analyze.
- Channel Count: More channels provide better flexibility, but for beginners, a two-channel model is typically adequate for most basic applications.
How to Use an Oscilloscope Effectively
Understanding how to set up and use an oscilloscope is crucial for accurate measurements. Following a systematic approach can simplify the learning process and enhance the effectiveness of your testing.
Setting Up Your Oscilloscope: A Step-by-Step Guide
To set up your oscilloscope:
- Connect the Power: Plug in your oscilloscope or ensure it is charged if it is a handheld model.
- Connect the Probes: Attach the probes to the oscilloscope channels. Ensure they are correctly grounded to avoid noise and inaccurate readings.
- Connect the Signal: Attach the probe tip to the circuit or signal you wish to analyze.
- Adjust Settings: Set the vertical scale to match the expected voltage levels and adjust the horizontal scale based on the signal frequency.
Essential Measurements: Voltage, Frequency, and Time
When using an oscilloscope, mastering basic measurements is key:
- Voltage Measurement: This is typically displayed as the vertical axis. Adjust the vertical scale to accurately read voltage levels.
- Frequency Measurement: Calculate frequency from the time period of one complete cycle of the waveform. The oscilloscope may have automatic measurement capabilities for ease.
- Time Measurement: Measure signal duration and periods by adjusting the horizontal scale. Time measurements help analyze the speed and behavior of signals.
Common Mistakes Beginners Make and How to Avoid Them
While learning to use oscilloscopes, beginners often make a few common mistakes. Here are tips to avoid them:
- Forgetting to ground the probe can lead to erratic readings. Always check connections.
- Incorrectly setting the time base can distort the waveform. Adjust the settings for optimal viewing.
- Neglecting to utilize the triggering function can result in unstable waveforms. Make use of various triggering modes to achieve a stable display.
Advanced Oscilloscope Techniques
Once comfortable with basic functions, users can explore advanced techniques to enhance their oscilloscope skills and improve their analysis capabilities.
Using Math Functions: Addition and Subtraction of Signals
Many modern oscilloscopes come with built-in mathematical functions that allow users to perform operations like addition and subtraction on waveforms. This can help in analyzing signal interactions:
- Signal Addition: Adding signals together can help ascertain cumulative effects or interference.
- Signal Subtraction: Subtracting one signal from another may reveal differences and anomalies between two signals.
Triggering Techniques for Clean Waveform Display
Triggering is essential for obtaining clear waveforms. Understanding how to use advanced triggering features can make a significant difference:
- Edge Triggering: Trigger the display based on specific voltage levels, making it easier to stabilize waveforms of repetitive signals.
- Pulse Width Triggering: Useful for capturing single-shot events, this technique allows the oscilloscope to trigger on pulses above or below a designated width.
Analyzing Complex Signals: Tips for Beginners
Complex signals can be challenging, but mastering the following tips can help:
- Utilize the zoom function to focus on particular segments for detailed analysis.
- Use cursors to measure specific points on the waveform accurately.
- Familiarize yourself with the signal path to recognize where issues may arise within a circuit.
Future Trends in Oscilloscope Technology
As technology evolves, oscilloscopes are also becoming increasingly sophisticated. Understanding future trends will help users stay ahead in their field.
The Rise of Smart Oscilloscopes: Features to Watch
Smart oscilloscopes are becoming more prevalent, incorporating features such as:
- Wireless Connectivity: Enable data transfer and remote monitoring, allowing users to analyze signals from the comfort of their devices.
- Integrated Software: Enhanced analysis tools and capabilities that simplify data interpretation and logging.
Integration with IoT and Mobile Applications
With the rise of the Internet of Things (IoT), oscilloscopes are starting to integrate with mobile applications. This allows users to:
- Control oscilloscopes remotely and visualize results on mobile devices.
- Receive updates and notifications about measurements and tests.
Preparing for the Future of Electronics Testing in 2026
As we approach 2026, preparing for advancements in electronics testing means continuously improving skills and staying informed about new tools and techniques. Investing in quality instruments, such as the HANMATEK handheld oscilloscopes, can provide the necessary edge in this evolving landscape.
What model of oscilloscope is best for beginners?
For beginners, models like the HANMATEK® HO102S, with its user-friendly interface and comprehensive features, are excellent choices.
How do you connect a probe to an oscilloscope?
To connect a probe, attach the probe tip to the circuit and the ground clip to the common ground. Ensure connections are secure to prevent inaccurate readings.
What are the key features to look for in a beginner oscilloscope?
Beginners should look for features such as sufficient bandwidth, an adequate sample rate, multiple channels, and user-friendly interfaces to facilitate learning.
How can you troubleshoot common oscilloscope issues?
Troubleshooting can include checking all connections, ensuring the oscilloscope is appropriately grounded, and adjusting the time base and voltage settings to stabilize the waveform display.
What resources are available for beginners learning oscilloscopes?
Beginners can find valuable resources in online tutorials, forums, and product documentation, which can guide them through the process of using oscilloscopes effectively.